Table of Contents
- What are Microsoft Defender for Endpoint Device Tags?
- Requirements
- Configuration
- Examples
- Results
- Conclusion
What are Microsoft Defender for Endpoint Device Tags?
Device tags in Defender for Endpoint are labels you assign to machines, making it easy to group, filter and remediate them. They help segment your environment by for example device types or by department. These tags are key to managing reporting, device group membership, Role-Based Access Control (RBAC), and automated investigation and remediation.
In Defender, device groups define which rules apply and who has administrative control. Each device belongs to one group, which controls auto-remediation levels and RBAC permissions. Tags act as the attribute that places devices into the right group.
You can push these tags directly from Intune using a custom OMA-URI profile. This lets you use your existing segmentation - device type or departments without extra scripts or manual work. The tag set in Intune flows straight into Defender, keeping one source of truth and consistent visibility.
- Each Intune policy applies one tag (the “Group” value).
- Tags have a 200-character limit; avoid parentheses and commas if you filter by tag in Defender.
- Tags deployed from Intune are reported by the device, so changes must happen in Intune or the script - editing tags directly in Defender will be overwritten on the next device report.
- There may be some delay before tags appear in the Defender portal.
More details: Create and manage device tags - Microsoft Defender for Endpoint.
Requirements
- Licensing: Microsoft Defender for Endpoint Plan 1 or Plan 2 or Defender for Business
- Management: Devices must be managed by Microsoft Intune
Configuration
We’re going to use a OMA-URI solution for this. But it’s also possible via Powershell script (see step 3). This profile tells the Windows Defender Advanced Threat Protection client which tag to report to Defender. Setting this up is straightforward once you know where to look.
Step 1: Plan your tags
Decide on tag values that match how you already segment devices in Intune, like device type (Shared, Kiosk, BYOD, Corporate) or department (Engineering, HR, Finance, IT). These tags will drive device group membership in Defender, influencing RBAC and auto-remediation. Keeping names aligned ensures consistent reporting and policy application.
Step 2: Create a custom OMA-URI profile in Intune
- Sign in to the Microsoft Intune.
- Navigate to Devices > Windows > Configuration profiles.
- Click + Create > New policy.
- Select Platform: Windows 10 and later. For Profile type, choose Templates > Custom (or Custom under Settings catalog if applicable).
- Enter a name like Win - Defender - MDE Tags for Kiosk Devices.
- Under Configuration settings, add an OMA-URI row with:
OMA-URI: ./Device/Vendor/MSFT/WindowsAdvancedThreatProtection/DeviceTagging/Group
- Data type: String
- Value: Your tag name (e.g.* KioskDevice*)
- Save, then assign the profile to the relevant assignment (one profile per tag).
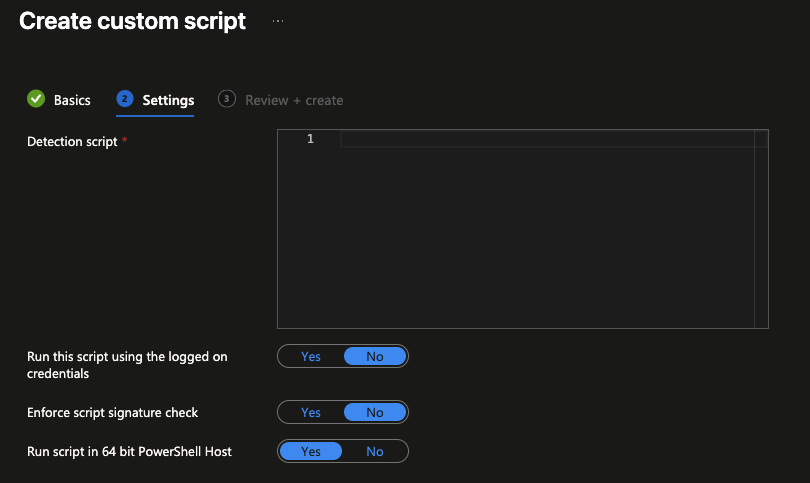
Step 3 (optional): Apply via Powershell instead of OMA-URI
Example PowerShell script (run as system, e.g. via Intune PowerShell scripts):
$registryPath = "HKLM:\SOFTWARE\Policies\Microsoft\Windows Advanced Threat Protection\DeviceTagging"
$name = "Group"
$tag = "KioskDevice" # Change per deployment: Shared, Kiosk, BYOD, Engineering, etc.

if (!(Test-Path $registryPath)) {
 New-Item -Path $registryPath -Force | Out-Null
}
Set-ItemProperty -Path $registryPath -Name $name -Value $tag -PropertyType String -Force
Deploy via Devices > Script and Remediations > Remediations or Platform Scripts in Intune, one script per tag value, assigned to the same device groups you would use for the OMA-URI profile. To remove the tag, set the Group value to an empty string; do not delete the key. The device tag is included in the daily device information report; a restart can trigger a new report sooner.
Step 4: Use tags in Defender for Endpoint
In the Defender portal, use Assets > Devices Device inventory and the Tags filter to see only devices with a given tag (e.g. all Shared or all Engineering). In Settings > Endpoints > Device groups, create or edit a device group and set membership to include devices where Tag equals your Intune-deployed tag; that group then drives RBAC and auto-remediation level. You can also filter and group by tag when triaging alerts or building dynamic lists for response actions.
Examples
The following scenarios show how device-type and department tags from Intune translate into clearer segmentation and safer automation in Defender for Endpoint.
Scenario 1: Device type - shared, kiosk, and BYOD
Challenge: You have shared workstations in common areas, kiosks in production and reception, and a growing number of BYOD Windows devices. You want shared and kiosk devices in a device group with limited or no auto-remediation so automated actions don’t disrupt multi-user or locked-down sessions, while corporate and BYOD devices get full remediation. SOC needs to filter by type when investigating incidents.
Solution: Create one Intune custom profile per device type-tag values Shared, Kiosk, and BYOD. Assign each profile to the device groups you already use for those segments (e.g. dynamic or static groups by naming, OU, or enrollment type). In MDE, create device groups whose membership rule is Tag equals Shared, Kiosk and BYOD, and set auto-remediation to None or Limited for Shared and Kiosk, and Full for optionally BYOD. Use the Tags filter in Device inventory for quick views by type.
Scenario 2: Department-based tagging (Engineering, HR, Finance)
Challenge: You need to report and scope security by department: how many Engineering vs HR vs Finance devices, which alerts affect which business unit, and optionally different RBAC so department-specific analysts see only their department’s devices.
Solution: Tag devices by department using Intune profiles with values such as Engineering, HR, Finance, IT. Assign each profile to the corresponding device group (e.g. “Engineering - Windows devices” populated by dynamic rule). In MDE, create device groups by tag (e.g. “Engineering devices,” “Finance devices”) and use them for filtering, reporting, and RBAC. Department leads or tier-1 SOC can filter Device inventory by tag and see only their scope.
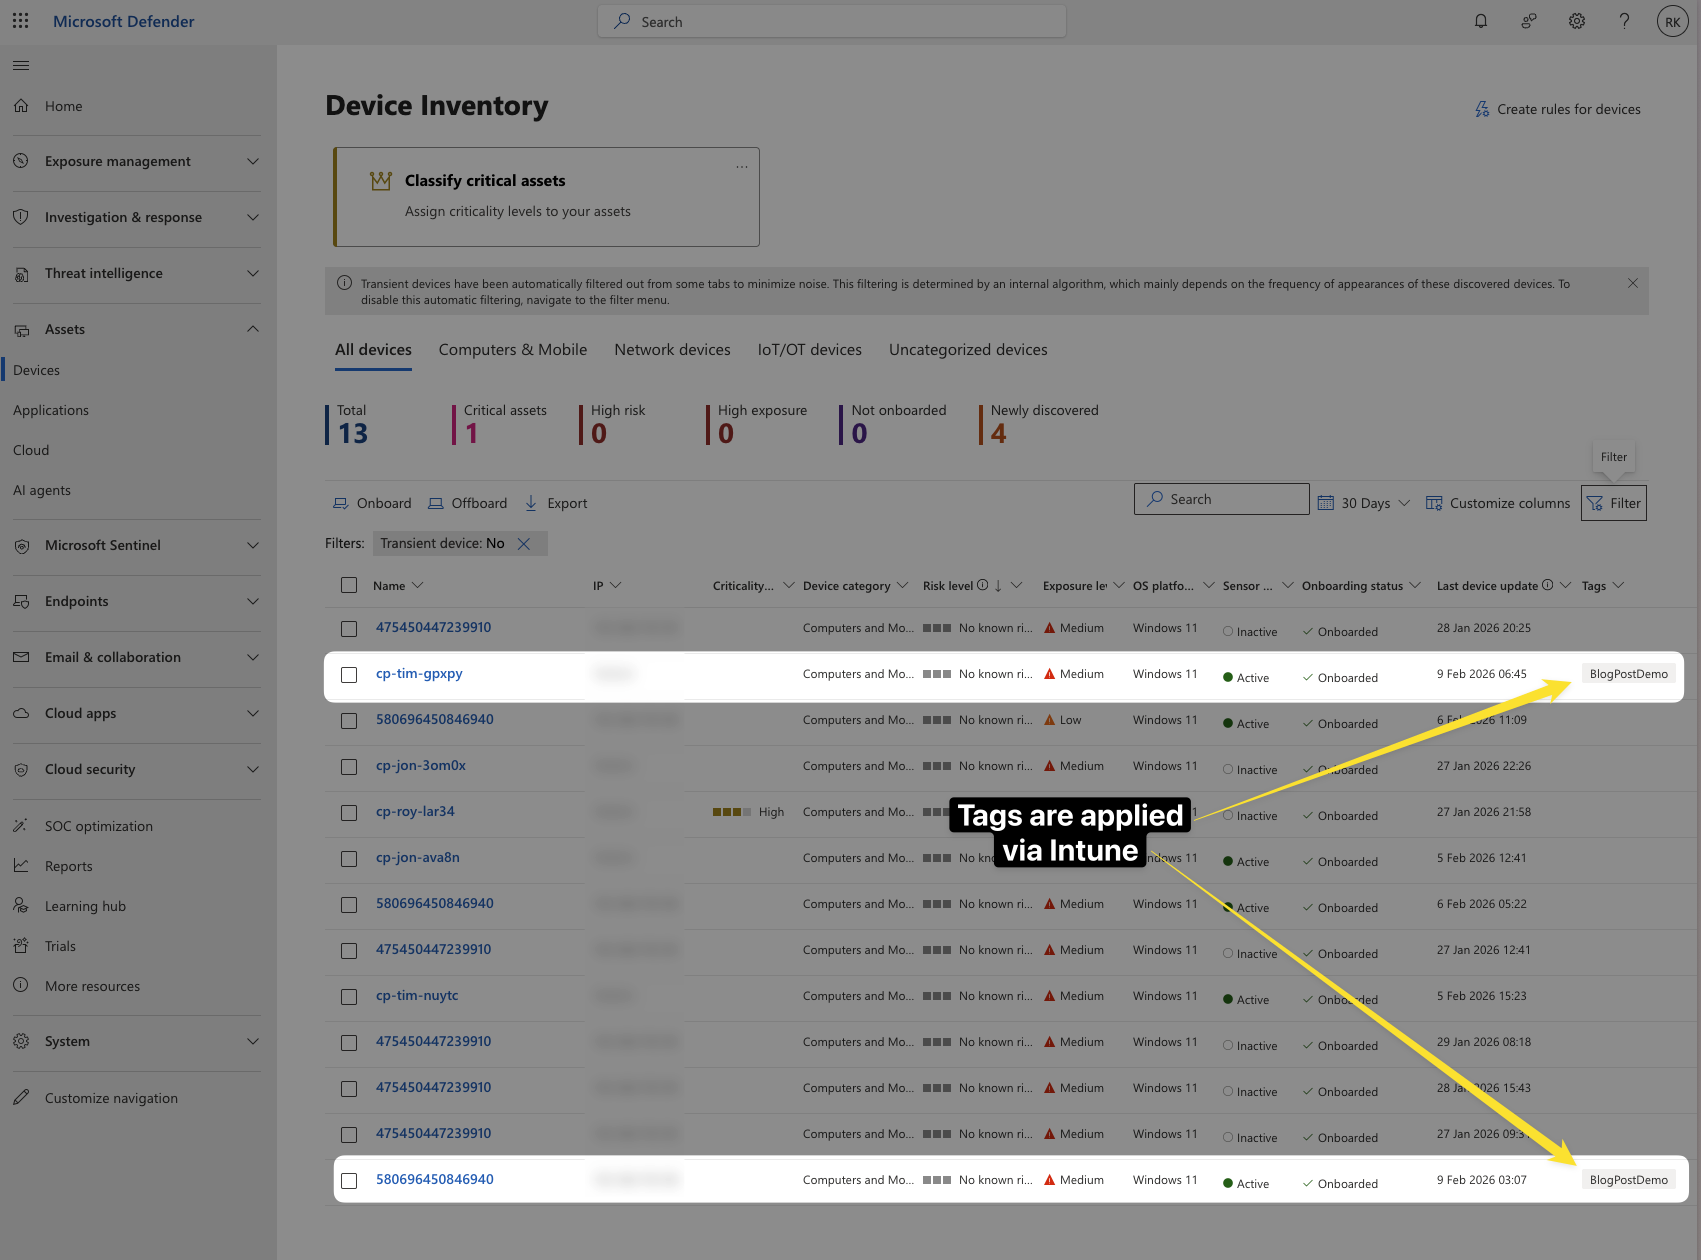
Results
After the device syncs and devices report to Defender for Endpoint, the tag appears in the Defender portal. In Device inventory you can filter by the tag to see only the devices that received it (in this case it was “BlogPostDemo” as tag). Device groups that use the tag in their membership rule will show the correct devices and apply the chosen RBAC and auto-remediation settings. Below is an example of the tag visible on a device in MDE after deployment from Intune.
Conclusion
Forgotten Features Series is about capabilities that are already there - and pushing MDE device tags from Intune is a prime example. One custom OMA-URI profile per tag, assigned to the device groups you already use for shared, kiosk, BYOD, or department, and sync does the rest. Device type and department defined in Intune flow into Defender for Endpoint for reporting, device groups, RBAC, and auto-remediation - without manual tagging in the Security Center or one-off scripts. The value is that you don’t have to bolt on automation or accept that “we can’t tag at scale”; you define the tag in Intune and it flows into MDE.
Because the tag is device-driven when deployed from Intune, changes belong in Intune; editing the tag only in the Defender portal won’t persist. For automatic tagging based on device attributes (name, domain, OS), you can complement this with dynamic rules for device tagging in Microsoft Defender XDR asset rule management.
]]>